
Making a Background Transparent with Movavi Photo Editor
From time to time you may want to take a photo of a subject, but leave the rest of the background transparent. Transparent backgrounds are particularly common online, and are used in logos and other images where you want just the subject to stand out.
Making the background of an existing photo transparent will take a bit of editing, but it really isn’t that difficult with Movavi Photo Editor. With its specialized tools you can easily isolate the subject and remove the background from a photo to create a transparency.
If you’d like to get started, just launch Movavi Photo Editor and click on the ‘Browse for Images’ button then select the photo that you would like to edit. If you prefer you can drag and drop the file into the main working area to open it as well.
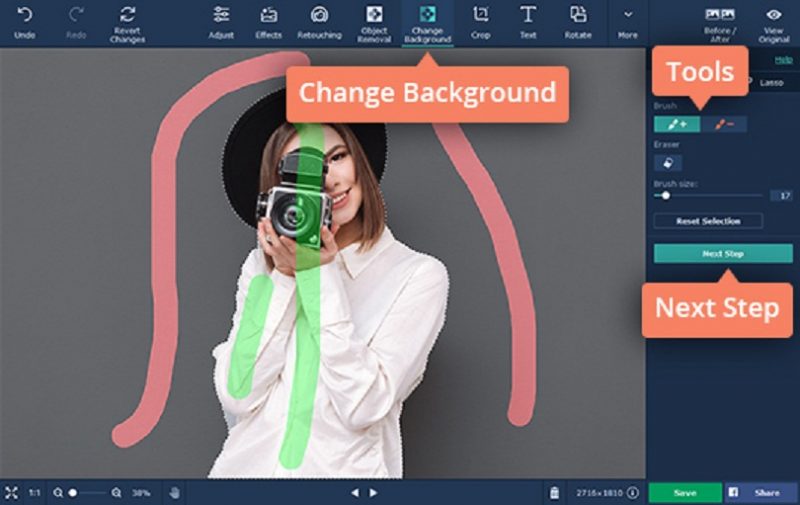
To access the tools you need, open up the ‘Change Background’ tab in the upper part of Movavi Photo Editor’s interface. Once you do, click on the ‘Foreground Brush’ and use it to mark the subject, then click on the ‘Background Brush’ and use it to mark the background. Don’t worry if the selection isn’t perfect, and click on the ‘Next Step’ icon when you’re ready.
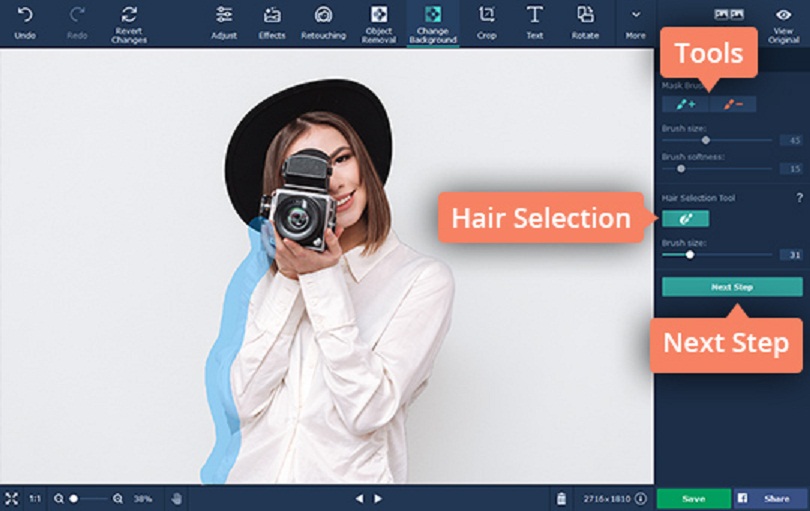
In the next step, you can refine the selection by using the ‘Foreground Mask’ tool to adjust the edges of the subject. Similarly you can use the ‘Background Mask’ tool to delete any background areas. If your photo has fine details (such as hair) you should use Movavi Photo Editor’s ‘Hair Selection’ tool as well.
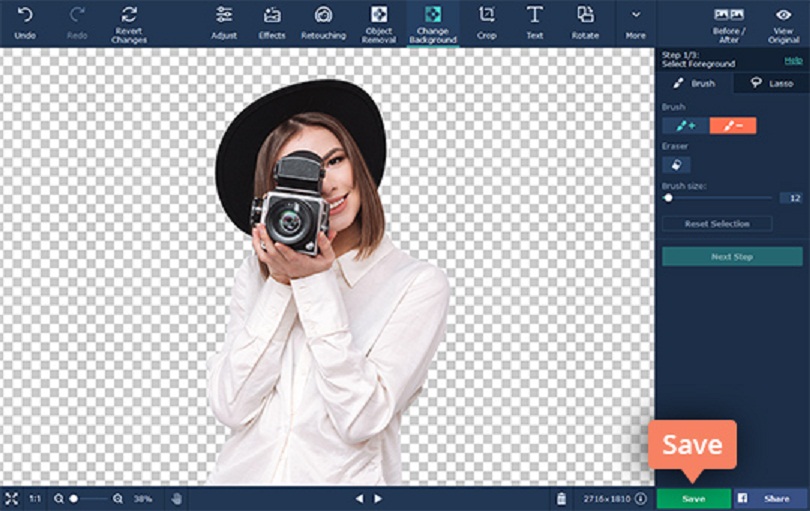
When you’re satisfied with the selection, click ‘Next Step’ again and this time Movavi Photo Editor will remove the background – effectively making it transparent. If you want you could click ‘Add Image’ to add a new background, but if you’d rather save it as a transparency just click ‘Apply’ then ‘Save’ to do so.
As you can see it is really very easy to make a background transparent, but if you need further instructions you should refer to https://www.movavi.com/support/how-to/how-to-make-an-image-background-transparent.html. Keep in mind Movavi Photo Editor has other features you may want to use as well, if you’re looking to enhance the quality of your photo, apply filters, add captions, touch up portraits, remove unwanted elements, and so on.
Because of how easy Movavi Photo Editor makes it to edit photos, you’ll be surprised just how much you’re able to alter and improve them. Try to spend a few minutes experimenting with each one of its features so that you familiarize yourself with them and understand what they can do. If you do that – you’ll be able to do far more than create transparencies with it.