Sewing amateur to pro in 8 simple steps.
Professional seamstresses might make it look easy, but sewing is one of the most skill-intensive hobbies and occupations out there.
It takes a lot of practice and patience to get good at, but even with all the hardships, it’s rather fun and exciting.
So, if you’re looking for some helpful tips to get good at sewing just like the professionals, then we have just the right guide for you.
We bring you 8 simple and easy to follow steps to help turn you into a sewing professional from an amateur in no time at all.
So just sit back and read along.
Step 1: Getting the Right Sewing Machine.
Your journey into the professional sewing field can’t really start if you’re not equipped with the right sewing machine.
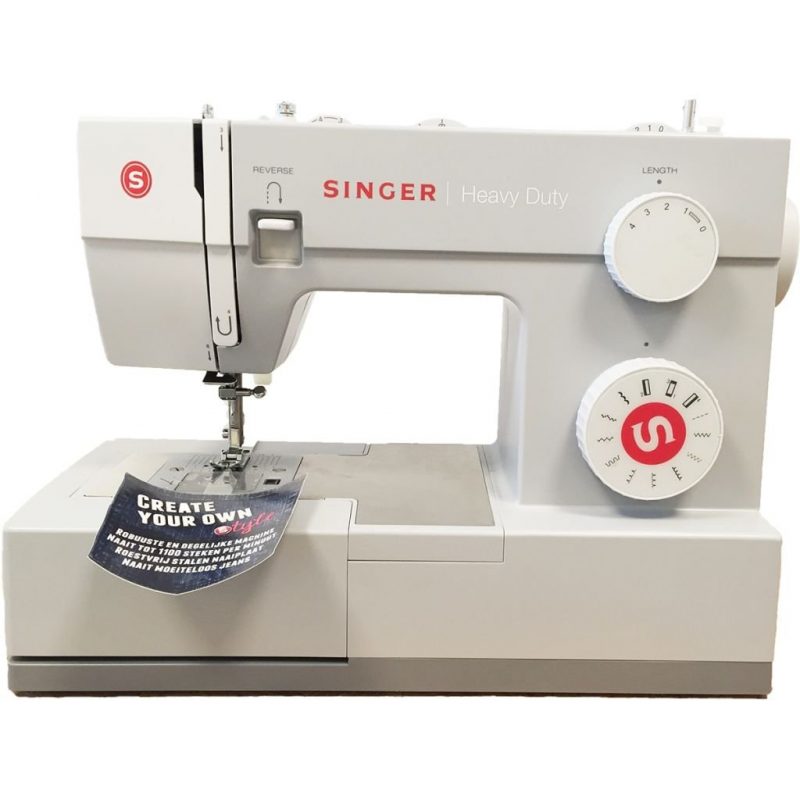
Websites like textilefutures.co.uk sell a variety of sewing machines that are capable of fitting each and every user’s needs and demands. So, if you plan to sew through layers of denim or canvas, then a heavy-duty sewing machine like Singer 4411 will cater to your goals perfectly.
Subsequently, if you plan on doing a lot of quilting, then it’s best to go for a model that caters to that specifically.
Step 2: Getting Good on your Cutting Skills.
Excess fabric hanging out of your garment will always make the entire thing look messy and unorganized.
Any seamstress will want his/her final product to look nice and neat, and the trick to making them look so is to efficiently cut off the unnecessary threads.
Precise cutting skills are also required when you have to fix and modify clothes. Additional cuts to your garments can make your project look more professional and attractive.
Step 3: Managing your Thread and Fabric Colors.
In most cases, it’s important to match the colors of both the fabric and the thread, but that is only if you don’t want the seams to be noticeable.
However, in certain dressing styles, using threads and fabric of two different colors creates a contrast that helps make that garment stand out.
In styles like gym apparel and tracksuits, the heavy usage of contrasting colors creates a unique aesthetic appeal.
Step 4: Learning to Press your Seams.
Now, a lot of amateurs don’t know this, but your seams should be pressed with a steam iron prior to starting your project.
Some professionals will even go as far as to wash and press the fabric before embarking on any major project. This ultimately makes the final product look neater and allow them to make a better fit.
As fabrics tend to shrink when in the washer or dryer, so it’s best to wash them beforehand and make them shrink before starting.
Step 5: Sewing Machine Maintenance.
Machine longevity is important, especially when you don’t want to unnecessarily spend on a newer model ever so often.
So, how can you make your sewing machine last longer and improve its overall longevity?
Now, the major cause of a sewing machine losing its longevity is because of the fabric getting stuck in it every now and then, as well as the lubrication ultimately fading.
And a great solution to counteract these problems is to thoroughly go through the manual and take up precautionary measures.
Amateurs hardly ever care for their sewing machines, and this is what often leads to them getting damaged.
So, we advise that you go through the manual and use the appropriate lubricating oil on the machine before starting your project.
Step 6: Don’t use cheap fabric and thread.
For just practice using cheap fabric and threads are ok, but for professional purposes, it’s always better to use ones that are of better quality.
However, always going for the best quality for your project may not always be the answer.
It’s important to balance the materials and pick the fabrics and threads which are going to match the quality that you desire.
Quality fabric can not only make your garments more appealing but improve their overall longevity as well.
Step 7: Use Top-Stitches.
Top-stitching your projects will make them look a lot more professional, and improve its overall appeal.
It’s a nice trick that a lot of the professionals use, but it’s not all that easy to achieve and will require a lot of practice on your end to get it done perfectly.
It’s better to start with edge stitching foot when you are getting started on your project.
This foot will help you to stay at least 1/4-inches away from the edge and help you get accustomed to the process much better.
There are a lot of things that can go wrong with a top stitch, which can ultimately make your project look untidy and unappealing.
It only works when done right; failing to do so will make your garment look very amateurish and have the exact opposite effect that you’re looking for.
Step 8: Master your seam finishing.
Finishing your seams perfectly is one of the hardest things to pull off in sewing. That’s precisely why most amateurs don’t finish them and leave them open and untidy.
But take it from us, finishing your seams is incredibly important if you want to make your projects look professional.
An easier way of finishing them is to use a pair of shears and to trim them out neatly. And as you need to trim out the extra threads anyway, this is a really good practice for any type of sewing project you are going to take up in the future.
Another way of finishing your seams is to use a serger machine. Serger machines are just amazing when it comes to producing consistent, professional-quality seams.
Happy Sewing!
Sewing is never an easy skill to master; it takes a lot of practice to become a professional in the field and taking a shortcut in your growth never really helps. But we hope that our easy to follow steps today were able to help you out with your struggles and set you on the right foot.
You can even check out some recent crafting industry facts for more news on the topic.
Till next time!


