The Devil Wears Prada 2 on Digital & DVD June 30
If you loved the original The Devil Wears Prada, get ready because everyone’s favorite fashion powerhouse is making a stylish
Read More
Welcome to the Entertainment section of Night Helper Blog. Here we share fun ideas, entertainment news, family activities, and engaging content that helps you relax, enjoy your free time, and discover new things to watch, read, and experience.

If you loved the original The Devil Wears Prada, get ready because everyone’s favorite fashion powerhouse is making a stylish
Read More
Kids are out of school, summer is officially here, and that means it’s the perfect time to gather the family,
Read More
A new biblical series The Faithful: Women of The Bible is offering a fresh look at the story of Genesis,
Read More
There are some movies you watch and enjoy in the moment, and then there are the ones that sit with
Read MoreIf you loved Zootopia 1, you will definitely enjoy watching Zootopia 2 from the comfort of your own home. The
Read More
There is something special about going to the movies that never goes out of style. In a world filled with
Read More‘Wicked: For Good’ film poster. Courtesy of Universal Pictures Universal Pictures Home Entertainment has announced their home entertainment releases of ‘Wicked:
Read More
Movie fans around the world, get ready for an unforgettable cinematic experience. LAST DAYS is coming to theaters on October
Read More
Get ready to flip your Friday upside down! Freakier Friday is the highly anticipated twist on the classic body-swap comedy
Read More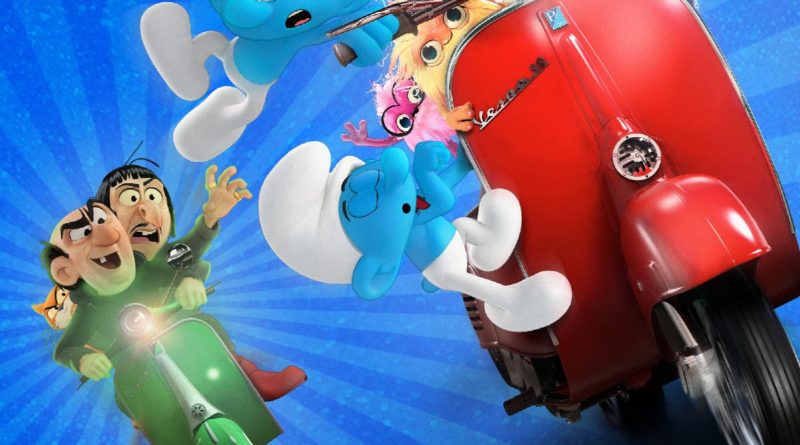
Bring home the magical adventure hailed as “the funniest family movie this year” (Dave Morales, KRIV-TV) when SMURFS arrives to buy or
Read More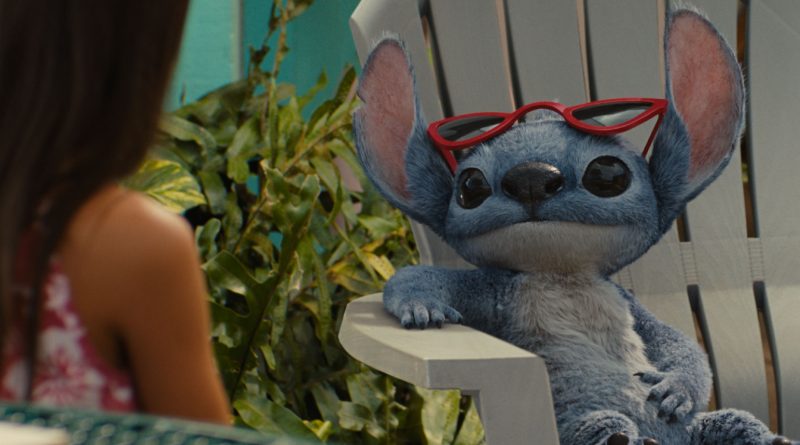
Disney’s Lilo & Stitch surfs onto digital platforms including Amazon Prime Video, Apple TV, and Fandango at Home on July 22, before making
Read More
BURBANK, CA (June 18, 2025) – Thunderbolts* turns up the heat this summer as it blasts onto digital platforms including
Read More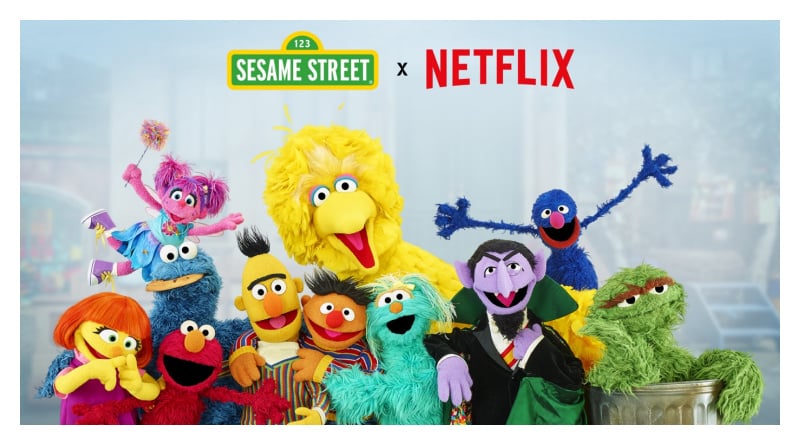
For more than a half a century, Sesame Street has been a beloved cornerstone of children’s media, enchanting young minds and nurturing
Read More
Film Synopsis In Marvel Studios’ “Captain America: Brave New World,” Sam Wilson (Anthony Mackie) – who now wields the shield
Read More
Finally, you and your family can now enjoy Disney’s Circle of Life with Mufasa: The Lion King available on digital
Read More
I don’t know about you, but I’ve been eagerly waiting for WICKED to be released! With my back injury, sitting
Read MoreI don’t know about you, but I’ve been eagerly waiting to add Moana 2 to my collection of favorite movies!
Read More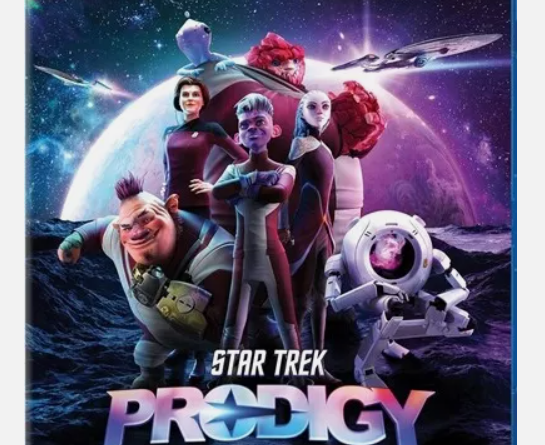
Star Trek: Prodigy – Season 2 coming to Blu-ray and DVD on November 12th from Paramount Home Entertainment and CBS
Read More
Here’s something for all you “SPONGEBOB SQUAREPANTS” Fans! SpongeBob’s 25th Anniversary Available on DVD November 19, 2024 LOS ANGELES, CA
Read More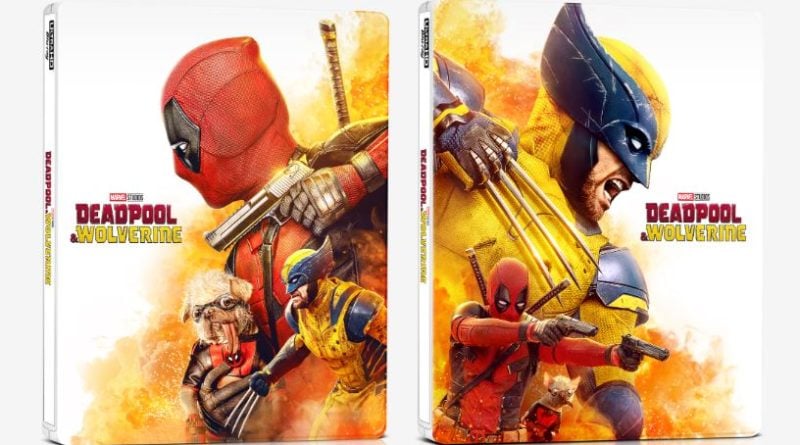
Film Synopsis: Marvel Studios presents their most significant mistake to date – Deadpool & Wolverine. A listless Wade Wilson toils
Read More